Create Shape
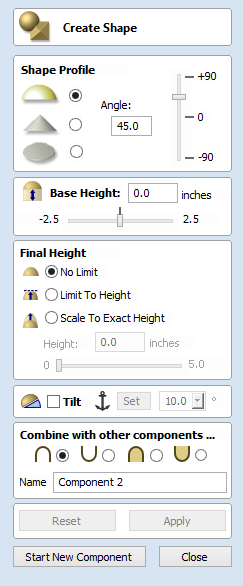
The Create Shape tool allows the user to create Components based on one or more closed vectors. The vectors can be selected either before the icon is clicked or after the form is open. The user works through the form specifying the profile and strength of the shape and modifying options to govern its height. There is also an option to Tilt the shape on an angle. Once any of the parameters have been defined it can be previewed by hitting .
This shape can be easily changed by altering the parameters in the form and hitting the button to update the preview. Once you are happy with the shape created then you have two choices, to (which will save your current component and start a new one) or the form.
Changing values with the slider on the form will immediately update the 3D view when you release the slider. If you make changes to the edit fields such as Angle or Base height, pressing the 'Space' bar on your keyboard after you have finished entering your value will apply the changes and update the 3D preview or you can hit the button again.
If you select another vector, then the current shape will be discarded, so remember to hit if you want to keep a copy of it.
Shape Profile
There are three different shape types:
Curved
![[object Object]](https://cdn.sanity.io/images/i7cqi3ri/production/6959b2c57acf65ce6fd71e5b1b1133694cae27d3-70x30.png)
Angle
![[object Object]](https://cdn.sanity.io/images/i7cqi3ri/production/889f0f5627de085d53597ef2466591cf21fcbd95-70x30.png)
This will define the angle of the edge of the rounded or angled profile shape - the higher the angle, the steeper the shape. Angular shapes can have a maximum angle of 89°. The slider bar to the right can also be used to change this as well as typing a specific angle into the form.
Flat
![[object Object]](https://cdn.sanity.io/images/i7cqi3ri/production/03be1479812ad759336f36b2f6401c74562b9008-70x30.png)
Base Height
Specifies the height of a flat 'base plane' added below the profile you have chosen.
Final Height
No Limit
Checking ✓ this option lets the combination of the size and shape of the vector and the specified profile values govern the final height of the shape.
Limit to Height
Checking ✓ this option limits the height of the shape by flattening it off at the value entered in the Height area of the form which becomes active once this option is selected.
Scale to Exact Height
Checking ✓ this option limits the height of the shape by scaling the shape up or down while retaining its general specified profile. It is scaled to the height entered in the Height area of the form which becomes available once this option is selected. The slider can also be used to change the final height.
The Base Height value is not included or controlled by the Final Height setting and if specified will be added to this value to give the total height of the component being created.
Tilt
When this option is checked ✓ the user can set a direction and angle to tilt the shape up at an angle in Z. The first part of this operation (once the option is checked ✓) is to press the button - then click two points in the 2D view.
The first click specifies the point which will remain at zero (the pivot point of the tilt).
The second click specifies the point that will be tilted upwards by the specified angle (the point that will be raised up).
The default angle (10°) can be edited by clicking the arrow next to the value and using the slider or by typing in a specific value and hitting the Space Bar on the keyboard to apply the angle.
Common Modeling Options
All of the main modeling tools in the software use a common set of commands to assign a name and combine mode to the component being created along with options to apply the settings in the form, reset the shape, start creating a new component and close to exit the function.
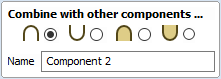
Combine with other components...
This section includes options to allow you to name your Component and control the way it will be combined with other objects in the Component Tree.
Reset
Clicking the button will remove the current shape, doing this before you Close the form will ensure that a component is not created from the current selection. Clicking this does retain the current set of selected vectors or Components.
Apply
Clicking the button will create a shape based on the settings you have chosen. You can continue making edits to the component by choosing different parameters within the form and hitting Apply to update it.
Start New Component
Al hacer clic en el botón Iniciar nuevo componente se guardará el estado del componente que se ha creado, se anularán la selección de todos los componentes/vectores e iniciarán de nuevo el proceso de creación en un nuevo componente. Los valores y las opciones del formulario se conservarán en este caso hasta que lo cierre.
Close
Clicking the button will close the form returning to the Modeling Tab icons and the updated Component Tree, reflecting any changes that you have made. If you wanted to remove the shape you just created then you can hit the Undo icon or use the keyboard shortcut to undo, CTRL+Z.